Using Xen for Virtualisation
Ages ago I wrote an article for the new defunct Flakey.INFO web site about how to set up Linux Vservers on Debian. Here is an archived copy of the article. For my day job, I had to set up some virtual servers to use for developers to have their own version of the live server to work on. We have CentOS (not my fave, but it's okay) at work, so I had this to play with.
Therefore I chose Xen (Hypervisor v3.0) over Linux Vserver, not because I particularly prefer the former, but just that it's supported as a core package in CentOS and hence makes installation and maintenance a little easier. Having used Xen for a while now, I reckon it's pretty cool, though I haven't set-up Vserver since I wrote that old article, so I can't comment on that.
Xen, like most virtualisation technologies, uses the concepts of host and guest operating systems. The host operating system is the one running on your server that runs the virtualisation software that hosts the guest operating systems that are the virtual machines themselves.
In our set up on our server, the host OS is a special Xen-aware version of the normal CentOS-packaged Linux kernel and the guest OSes are again, special versions that can deal with running on virtualised hardware. By the way, the guest OSes can be any OS that has been adapted to run under Xen, such as Linux, FreeBSD, Windows, etc.
Xen uses the terminology domain to refer to the different virtual machines. You can think of the domain as being the scope that the various processes running on a virtualised machine have to access the system's process stack, memory and storage. There are two main terms:
- Dom0
- The top-level domain (Domain 0): this is the host operating system.
- DomU
- Virtual machine domain, these are the guest operating systems.
Installing Xen host OS (Dom0)
As mentioned, these instructions are good for CentOS.
Installed it thus:
% yum install kernel-xen xen xen-libs
And also installed the following (for good measure, not sure if they were really required):
% yum install virt-what virt-manager kmod-xfs-xen kmod-xenpv
Then I checked /boot/grub/menu.lst and made sure that the kernel was installed and that it was the first one that would boot by default:
default=0
timeout=5
splashimage=(hd0,0)/grub/splash.xpm.gz
hiddenmenu
title CentOS (2.6.18-274.7.1.el5xen)
        root (hd0,0)
        kernel /xen.gz-2.6.18-274.7.1.el5
        module /vmlinuz-2.6.18-274.7.1.el5xen ro root=/dev/VolGroup00/LogVol00
        module /initrd-2.6.18-274.7.1.el5xen.img
And rebooted.... now the kernel is the Xen one:
[root@host ~]# uname -a
Linux host.domain.com 2.6.18-274.7.1.el5xen #1 SMP Thu Oct 20 17:06:34 EDT 2011 x86_64 x86_64 x86_64 GNU/Linux
That's it as far as it goes. Now on to install some guest OSs....
Choosing network settings for your VMs
You'll need a free IP address for each VM, and you'll also need to set up some Mac addresses for your VMs' virtual network interfaces. Here's an example table to get you started....
| guest name | description | device | MAC | IP | Gateway | Netmask | Hostname |
|---|---|---|---|---|---|---|---|
| vserver0 | Vserver #0 | xenbr0 | 00:00:00:00:00:00 | 10.0.0.100 | 10.0.0.1 | 255.255.255.0 | vserver1.mydomain.com |
| vserver1 | Vserver #1 | xenbr1 | 00:00:00:00:00:01 | 10.0.0.101 | 10.0.0.1 | 255.255.255.0 | vserver2.mydomain.com |
| vserver2 | Vserver #2 | xenbr2 | 00:00:00:00:00:02 | 10.0.0.102 | 10.0.0.1 | 255.255.255.0 | vserver2.mydomain.com |
| vserver3 | Vserver #3 | xenbr3 | 00:00:00:00:00:03 | 10.0.0.103 | 10.0.0.1 | 255.255.255.0 | vserver3.mydomain.com |
| vserver4 | Vserver #4 | xenbr4 | 00:00:00:00:00:04 | 10.0.0.104 | 10.0.0.4 | 255.255.255.0 | vserver4.mydomain.com |
As you can see in the above, the netmask and gateway are the same for all VMs, but we're incrementing the IP address and Mac address by 1 for each. You can come up with your own scheme if you like, but this worked for me.
Installing a Guest OS - Linux
I'm creating template Guest OS installs here as I want multiple matching vservers for each developer and one for staging, but you might not want this. However you may as well follow these instructions as they're good for a single server that'll never get cloned.
Referring to the instructions at http://wiki.centos.org/HowTos/Xen/InstallingCentOSDomU I started by setting up a new virtual machine to be used as a template for all future machines.
Created a virtual disk to store the virtual machine in:
dd if=/dev/zero of=/srv/xen/devserver.img oflag=direct bs=1M count=20480
This will form the template machine that will then be copied for each developer instance.
Next I fetch the installation kernel and ram disk from http://mirror.centos.org/centos/5/os/x86_64/images/xen/ saving them in /srv/xen rather than /boot as the latter partition isn't that big:
cd /srv/xen
wget http://mirror.centos.org/centos/5/os/x86_64/images/xen/vmlinuz
wget http://mirror.centos.org/centos/5/os/x86_64/images/xen/initrd.img
mv vmlinuz vmlinuz-xen-install
mv initrd.img initrd-xen-install
Now I fire up my new virtual machine:
xm create devserver
Using config file "/etc/xen/devserver".
Started domain devserver

xm console devserver
Bootdata ok (command line is )
Linux version 2.6.18-274.el5xen (mockbuild@builder10.centos.org) (gcc version 4.1.2 20080704 (Red Hat 4.1.2-50)) ...
BIOS-provided physical RAM map:
Xen: 0000000000000000 - 0000000040800000 (usable)
....
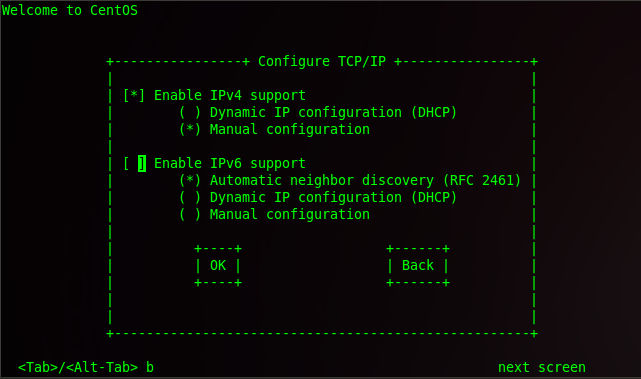
And get taken to a terminal based install. The first couple of screens ask you to select the language, and the method of installation, the former being your choice (though English might be a cunning plan) and the latter should be 'HTTP. On the next screen, which is IP configuration, choose to do manual IPv4 configuration and to disable IPv6 support:
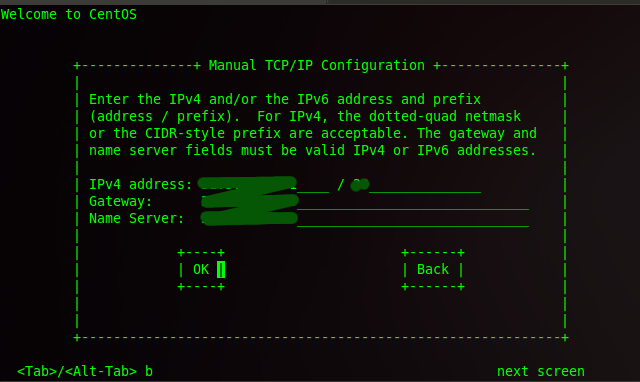
Then on to the configure the network:
See the table below on the settings for this .... TODO .. A table of network settings for the virtual machines.
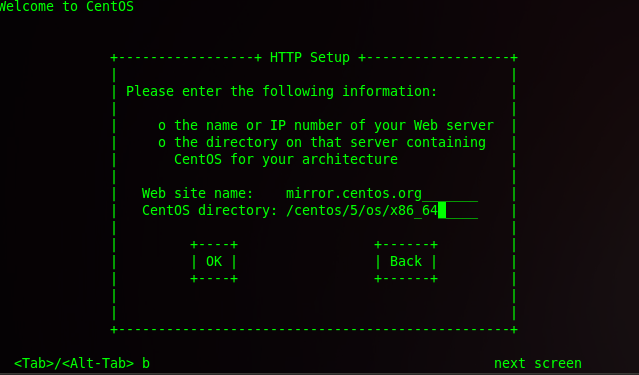
Then specify the location of the guest OS you're installing:
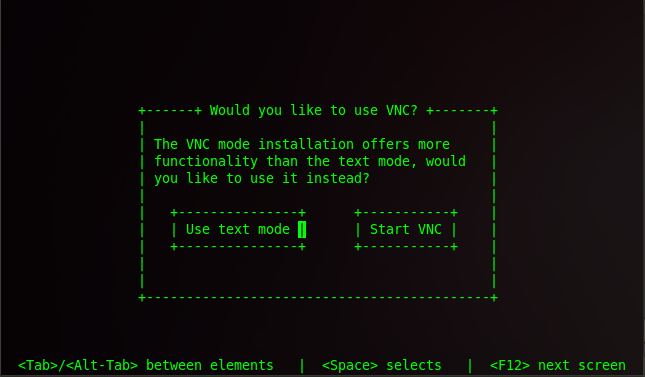
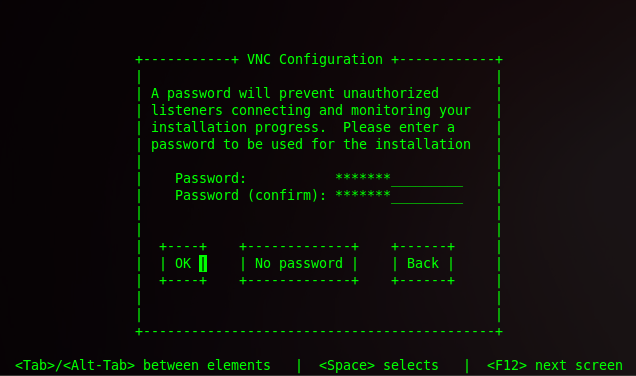
The next screen allows you to choose to use VNC to do a graphical install, this is the method I decided to take, so the following screens cover that, if you go for console install, then you're on your own:
On the next screen, I had trouble connecting if I used a password, so in the end I went with the no password option and it worked:
This booted my virtual machine...
Probing for video card:   Unable to probe
No video hardware found, assuming headless
Starting VNC...


WARNING!!! VNC server running with NO PASSWORD!
You can use the vncpassword=<password> boot option
if you would like to secure the server.


The VNC server is now running.
Please connect to XX.XX.XX.XX:1 to begin the install...
Press <enter> for a shell
Starting graphical installation...
XKB extension not present on :1
On my machine, I connected using the command line (but if you have a graphical client on Windows, it should be fairly easy to end the host name):
adelayde@myhomebox:~$ xtightvncviewer -bgr233 -quality 0 -compresslevel 4 XX.XX.XX.XX:1
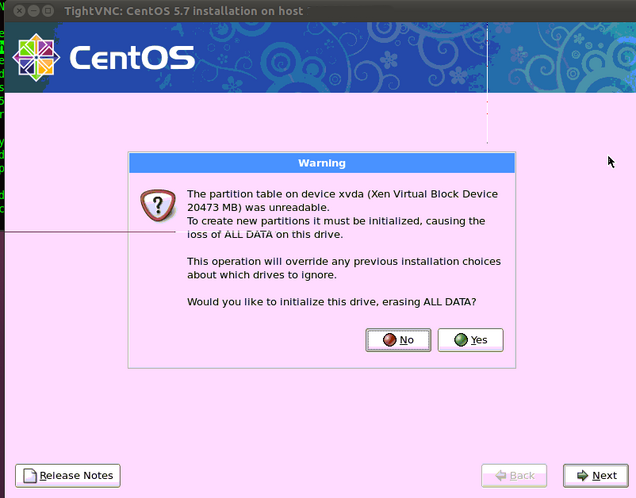
And hey presto, I ended up here:
Do Next and Yes, get to:
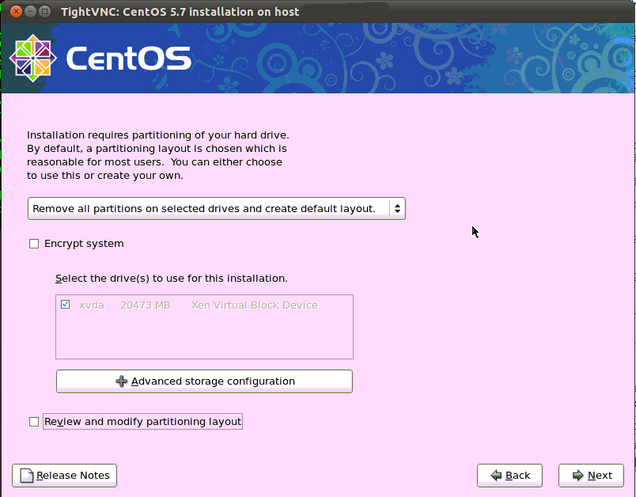
Choose Remove all partitions... option and click Next:
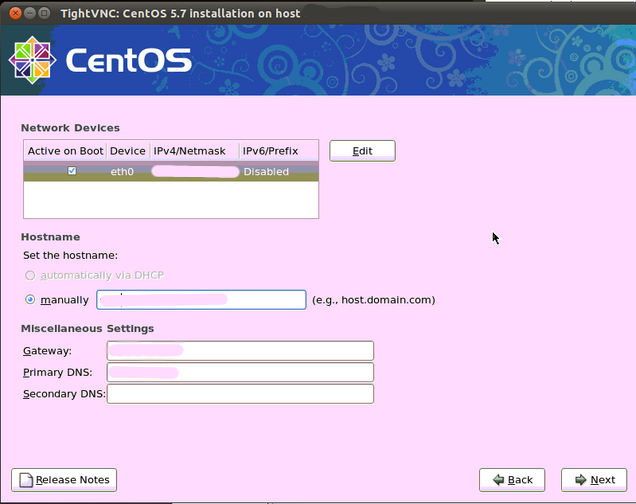
Check network configuration, and Next:
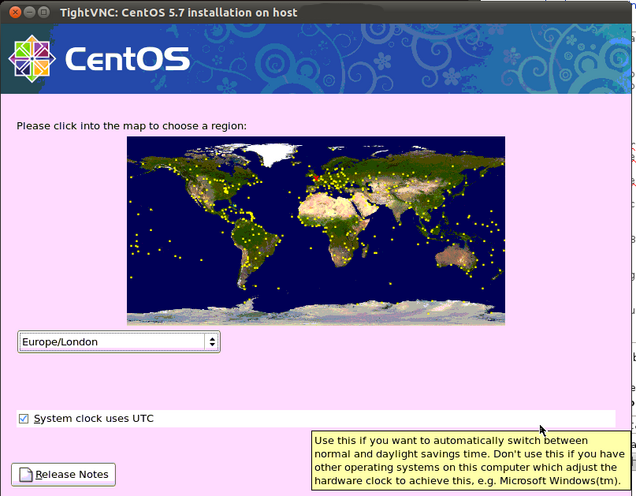
Choose time zone of Europe/London and Next:
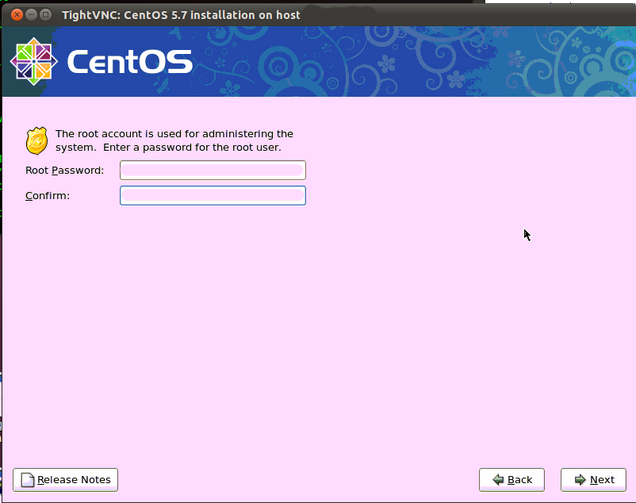
Specify a root password and click Next:
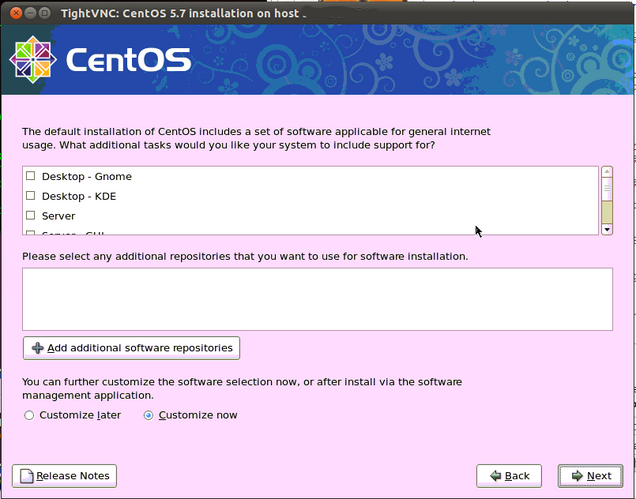
Unselect all the additional tasks that may be ticked by default, select Customize Now and click Next:
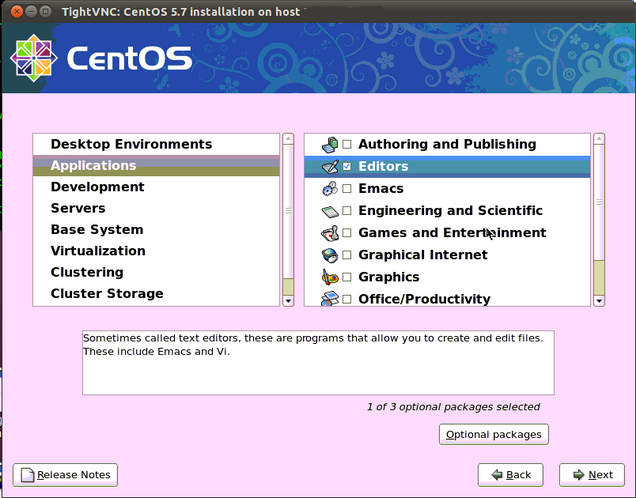
Now choose some stuff to install, for example, this might be good for a development web server:
- Applications
- Editors, Text-based Internet
- Development
- Development Libraries, Development Tools
- Servers
- FTP Server, MySQL Database, Web Server
- Base System
- Base, Java, System Tools
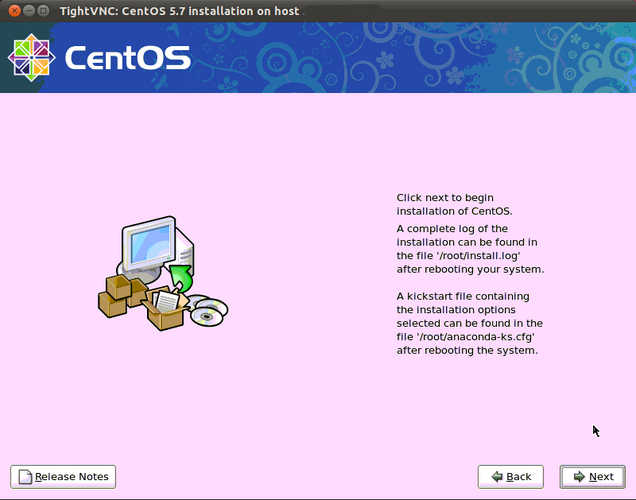
Click Next:
And click Next again and wait for CentOS to install (about 40 mins)....
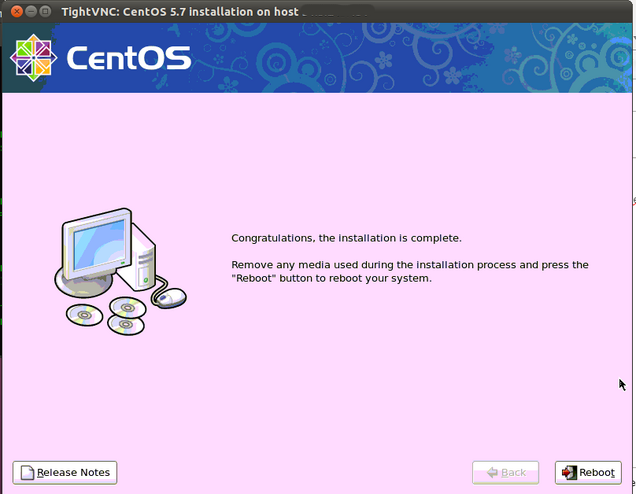
Once complete, click Reboot. Upon rebooting, the VNC connexion is terminated and output is switched back to the console:
duration: 7249(ms)
sending termination signals...done
sending kill signals...done
disabling swap...
	/dev/mapper/VolGroup00-LogVol01
unmounting filesystems...
	/mnt/runtime done
	disabling /dev/loop0
	/proc done
	/dev/pts done
	/sys done
	/tmp/ramfs done
	/selinux done
	/mnt/sysimage/boot done
	/mnt/sysimage/sys done
	/mnt/sysimage/proc/bus/usb done
	/mnt/sysimage/proc done
	/mnt/sysimage/selinux done
	/mnt/sysimage/dev done
	/mnt/sysimage done
rebooting system
Restarting system.
At this point we switch the guest config to be a normal, rather than an install config. Editing file /etc/xen/devserver:
name = "devserver"
memory = "1024"
disk = [ 'tap:aio:/srv/xen/devserver.img,xvda,w', ]
vif = [ 'bridge=xenbr0', ]
bootloader="/usr/bin/pygrub"
vcpus=1
on_reboot = 'restart'
on_crash = 'restart'
[root@eros xen]# xm create devserver
Using config file "/etc/xen/devserver".
Using <class 'grub.GrubConf.GrubConfigFile'> to parse /grub/menu.lst
Started domain devserver
Creating a clone of an existing (template) machine
- Log in to your Xen server host and go to the directory /srv/xen.
- Once there copy the 20GB disk image devserver-template.img to a new file, the name of your new server.
- Now go to /etc/xen and copy the devserver-template file to whatever the new server name you want - try to always use the same name to make life easy!
- Edit your new config file, it looks like the following:
name = "myserver"
memory = "1024"
disk = [ 'tap:aio:/srv/xen/myserver.img,xvda,w', ]
vif = [ 'bridge=xenbr0,mac=00:00:00:00:00:00,ip=XX.XX.XX.XX', ]
bootloader="/usr/bin/pygrub"
vcpus=1
on_reboot = 'restart'
on_crash = 'restart'
Change the MAC address and IP to match those for your system.
If you want to have your virtual machine automatically boot when the server boots, change to the auto directory and add a symbolic link:
cd auto
ln -s ../myservername .
- Now you can boot your machine with:
xm create myservername
And enter to it's console directly (as the networking won't work at this point):
xm console myservername
Once you get the login prompt, login as the root user and configure your hostname by editing /etc/sysconfig/network:
HOSTNAME=myhost.mydomain.com
Then run the command setup and choose Network Configuration -> Edit Devices -> eth0 (ignore eth0.bak), change this screen to something like the following:
- Name
- eth0
- Device
- eth0
- DHCP
- disabled
- Static IP
- XX.XX.XX.XX
- Netmask
- XX.XX.XX.XX
- Gateway
- XX.XX.XX.XX
You'll probably find it useful to edit /etc/profile to set your command prompt, by adding the following at the end:
PS1="[\u@\h \W]\\$ "
export PS1
Once you have completed this, restart the v-server:
xm reboot myservername
Ctrl-] should get you back to your Host server from the Guest OS
Installing a Guest OS - Windows 2003 server
Referring to the instructions at http://mediakey.dk/~cc/howto-install-windows-xp-vista-on-xen/
http://balajitheone.blogspot.com/2010/10/installing-windows-on-xen.html
I first needed to reboot the server and enable virtualisation support.
Now when I do:
# xm info |grep xen_caps
I get:
xen_caps : xen-3.0-x86_64 xen-3.0-x86_32p hvm-3.0-x86_32 hvm-3.0-x86_32p hvm-3.0-x86_64
This means we can support W2.3K under Xen! :) (or is that a :( ?)
So here we go, the configuration file:
name = "dozebox"
uuid = "??????????????"
maxmem = 1024
memory = 1024
vcpus = 1
builder = "hvm"
kernel = "/usr/lib/xen/boot/hvmloader"
boot = "c"
pae = 1
acpi = 1
apic = 1
localtime = 0
on_poweroff = "destroy"
on_reboot = "restart"
on_crash = "restart"
device_model = "/usr/lib64/xen/bin/qemu-dm"
sdl = 0
vnc = 1
vncunused = 0
keymap = "en-gb"
# use the next line to install the OS
disk = [ "file:/srv/xen/timberbase.img,hda,w", "file:/srv/xen/office-2003-disc1.iso,hdc:cdrom,r" ]
# and then this line once it's installed
#disk = [ "file:/srv/xen/timberbase.img,hda,w", ]
vif = [ "mac=00:00:00:00:00:00,bridge=xenbr0,script=vif-bridge" ]
parallel = "none"
serial = "pty"
